Similar to overnight oats, the dough for this Easy Honey Oat Bread is mixed together in a bowl and rests while you sleep. In the morning it’s ready to transfer into a Dutch Oven and bake. It really can’t get any easier than this. All it takes is 5 ingredients, plus warm water, to create this delicious bread. Simply mix, cover, and bake. No one will believe you made this bread from scratch in your kitchen with almost no effort at all!
I remember the first time I made “no knead bread” vividly because I missed an important detail when I skimmed the recipe. The fact that the dough needs to sit on the counter for 10-12 hours! This is completely different than most bread recipes where the dough rises for only 1-2 hours or until doubled in size. Which got me thinking, maybe a better name for these kind of bread recipes would be Overnight Bread instead of No Knead bread? This way you don’t miss the fact that the dough has to rest overnight!
Regardless if we call this Overnight Bread or No Knead Bread, the most important detail is that it’s Easy! Whether you are new to making bread or have been making homemade bread for years, this Easy Honey Oat Bread Recipe won’t disappoint. The end result looks like you worked all day in the kitchen creating a perfect loaf of bread from scratch. Yet, there is no kneading, dough hooks, or bread machine needed for this simple recipe.
When I named this recipe “easy”, I truly mean it’s easy. The dough comes together in less than 10 minutes, sits on the counter at room temperature overnight, and is ready to bake in the morning. The only catch is you need a Dutch Oven to make the bread into the shape of an artisan bread loaf. For this, and many other reasons, a Dutch Oven is completely worth the investment. From baking homemade bread to creating delicious soups like my Hearty Homemade Minestrone Soup Recipe, I highly recommend owning a Dutch Oven!
Although I am partial to my Le Creuset Dutch Oven and have used it almost everyday for over 12 years, it was quite an investment. An Emile Henry Bread Pot is a fraction of the price and will also work for this recipe. For an even less expensive brand, check out Lodge. The bottom line is you don’t need an expensive Dutch Oven to make this Easy Honey Oat Bread Recipe but please note not all are created equal. Also note: I am not being paid to suggest brands. I simply have a few favorites.
Other than a Dutch Oven, there are very few kitchen gadgets needed to make this bread. No mixer, dough hook, or bread machine because this dough doesn’t require any kneading! Only 5 ingredients, plus warm water, mixed together in a bowl with a wooden spoon, allowed to rest, and then baked.
Below is a short list of ingredients and kitchen equipment needed. Notice I suggest Organic Flour and Oats. There is a reason for this! Organic wheat and oats have NOT been sprayed with harmful chemicals. Feel free to reach out to me for recommendations for organic and local sources for these ingredients. I am happy to share my favorites.
Ingredients
- Organic All-Purpose Flour
- Organic Oats
- Sea Salt
- Active Dry Yeast
- Warm Water
- Local Honey
Kitchen Equipment
- Large Glass Bowl
- Glass Measuring Cup (2 cup)
- Wooden Spoon
- Measuring Spoons (1 tsp-1 Tbs)
- Multi-Purpose or Pastry Dough Scraper
- Dutch Oven
Since the dough for this bread needs to sit on the counter for at least 10 hours before baking, I recommend mixing the ingredients the night before. See why I think it should be called Overnight Bread? Don’t worry though, mixing the dough takes less than 10 minutes and requires nothing more than a few ingredients, a large bowl, and wooden spoon. After resting over night, the dough is ready to transfer into a Dutch Oven and bake. It really can’t get any easier than this!
Recipe
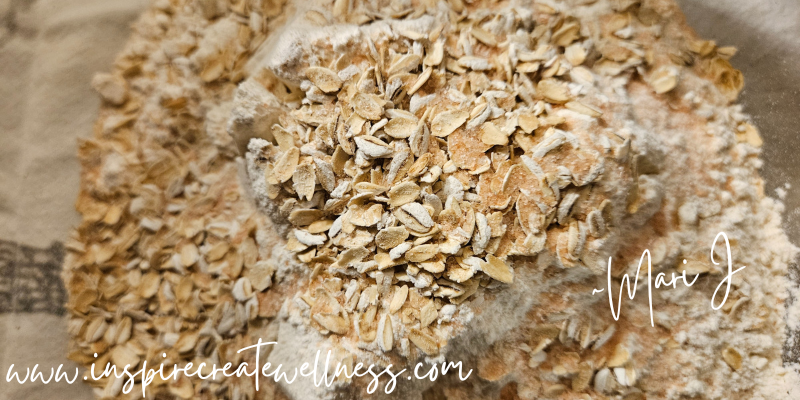
Add 2 3/4 cups Organic All-Purpose Flour, 1/4 cup Organic Oats, 1 1/2 teaspoons Sea Salt, and 1/2 teaspoon Active Dry Yeast to a large glass mixing bowl.
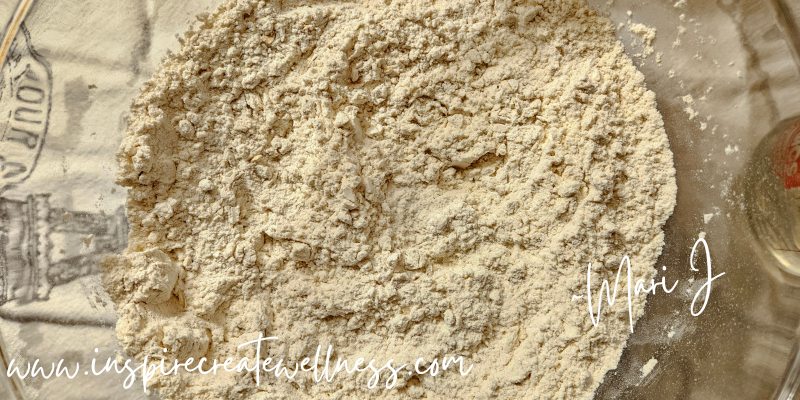
Stir to combine all dry ingredients making sure to distribute the salt and yeast throughout the flour.
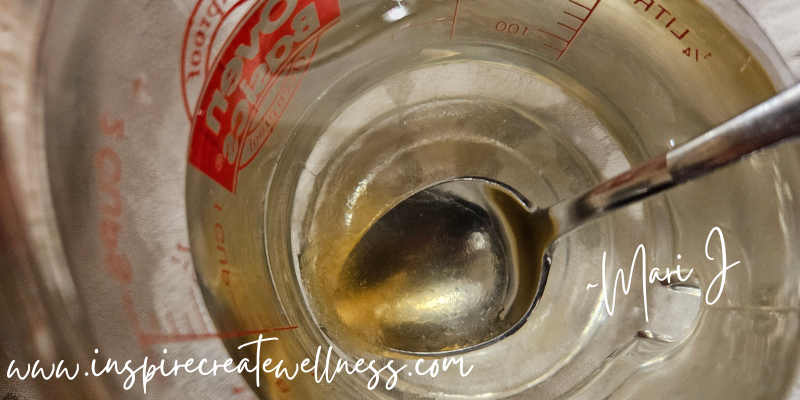
Measure 1 1/2 cups Warm Filtered or Spring Water and combine with 1 teaspoon Local Honey. Stir until all the honey is dissolved in the water. A 2 cup glass measuring cup works well for this.

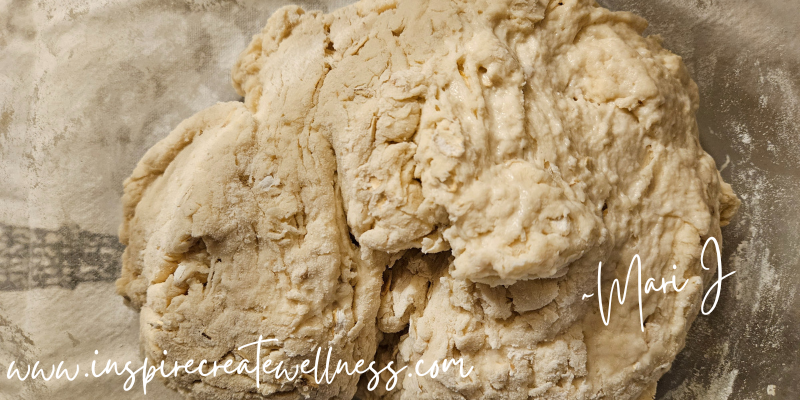
Pour the warm honey water over the dry ingredients and mix with a large wooden spoon. The dough will be “shaggy” and come together quite quickly. Once all the ingredients are incorporated and it starts to form a ball, stop mixing and cover the bowl with a clean kitchen towel. Let rest overnight or for at least 10 hours, covered on the counter.
The next morning you will wake up to dough that is ready to transfer into a Dutch Oven and bake!
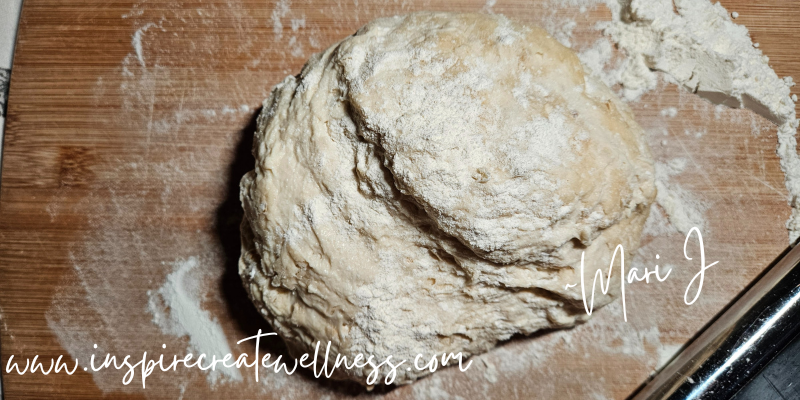
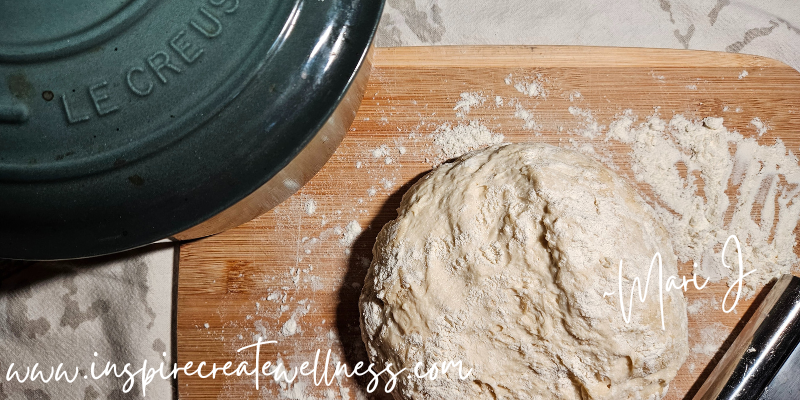
Remove the dough from the bowl and place on a floured surface. Using a pastry scraper and a few sprinkles of flour, form into a round dough ball. Sprinkle the top of the dough with a little flour as well. Cover the dough with a clean kitchen towel and allow the dough to rest for 30 minutes while you heat the empty Dutch Oven and lid in a 400 degree oven.
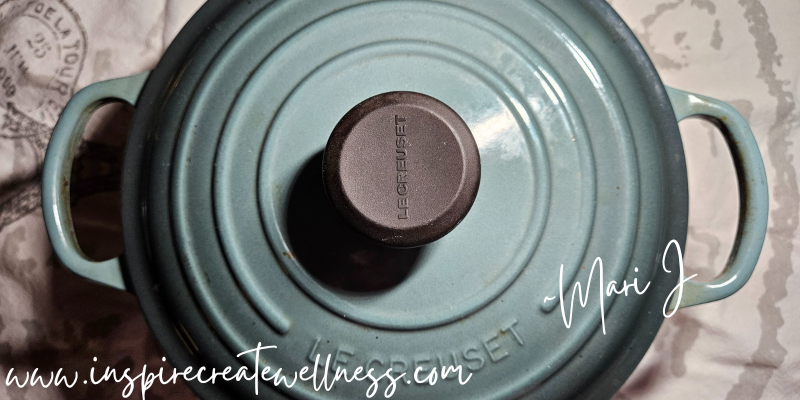
Place the EMPTY Dutch Oven, with the lid on, into a 400 degree oven for 30 minutes while the dough is resting. This step seems a little crazy but it’s vital to making this bread!
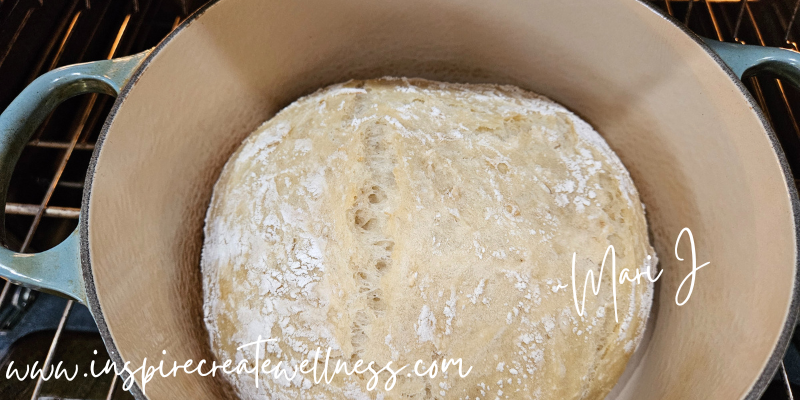
Remove the hot Dutch Oven from the 400 degree oven. Take the lid off and place the dough in the center of the Dutch Oven using a pastry scraper. Be careful! Remember the Dutch Oven and the lid are 400 degrees. Use a hot pad to put the lid on and place back in the 400 degree oven for 30 minutes (with the lid on).
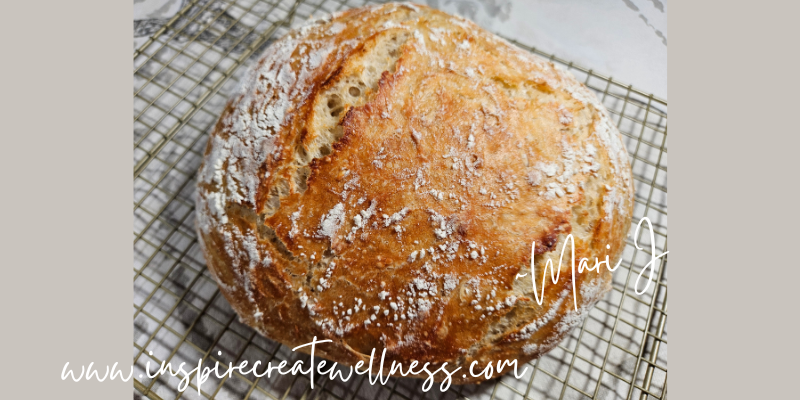
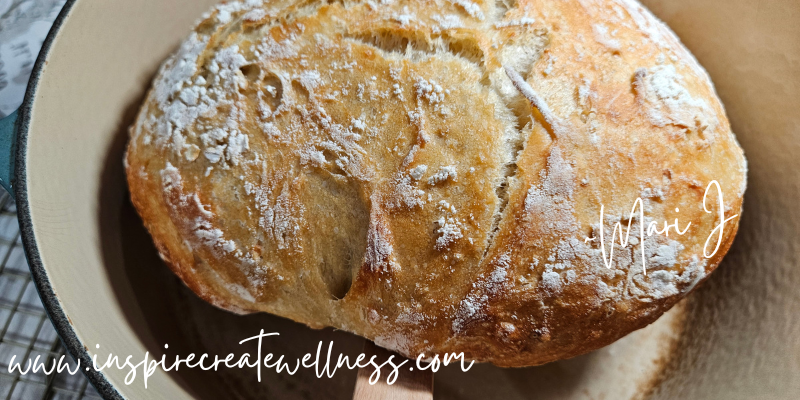
After 30 minutes of baking with the lid on, remove the lid, and bake for an additional 10 minutes. This will create the golden brown crispy crust. Above you can see what the bread looks like after its been baking for 30 minutes with the lid on but not for long!
Just 10 minutes later the bread is golden brown and ready to come out of the oven. As soon as you take the bread out of the oven, remove it from the Dutch Oven. Use the back of a wooden spoon to lift and grab (with hot pads) the bread and place it on a cooling rack. Make sure you do NOT leave it in the hot Dutch Oven!
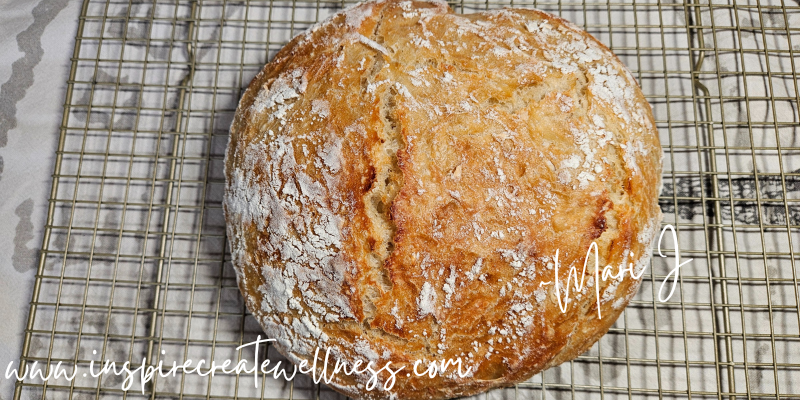
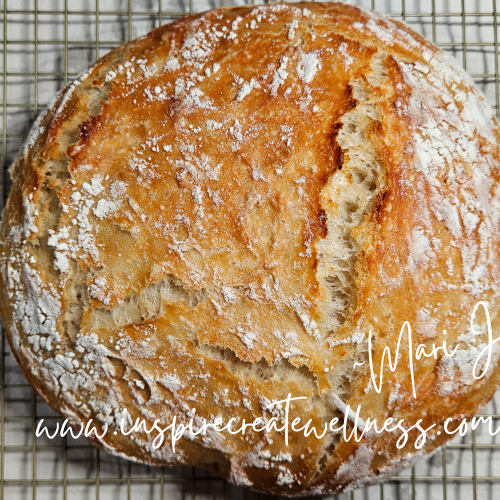
Now for the final and hardest step of all. Allow the bread to cool before slicing! I bet you can imagine what your house will smell like at this point, making it even harder to wait. All I can say is it’s worth letting it cool before slicing!
This bread is perfect for avocado toast, sandwiches, and grilled cheese. It can be left on the counter for up to 3 days before it should go in the freezer. I recommend slicing it before freezing so it is handy when you need it. Defrost slices directly on the counter or toast in a toaster from frozen. But who are we kidding? Most likely leftovers will not be an issue!
Below you will find my printable recipe for Easy Honey Oat Bread. As always, I encourage you to use this recipe as inspiration to create your own variation. Please give this recipe a try and let me know what you think!
Easy Honey Oat Bread
Ingredients
- 2 3/4 cups Organic All-Purpose Flour
- 1/4 cup Organic Oats
- 1 1/2 tsp Sea Salt
- 1/2 tsp Active Dry Yeast
- 1 1/2 cups Warm Filtered or Spring Water
- 1 tsp Local Honey
Instructions
- Add Organic All-Purpose Flour, Organic Oats, Sea Salt, and Active Yeast to a large mixing bowl. Stir to combine the dry ingredients.
- Combine Warm Water and Local Honey in a 2 cup glass measuring cup. Stir until the honey is completely dissolved.
- Pour the Warm Honey Water over the dry ingredients and mix with a large wooden spoon. The dough will come together quite quickly. Once it starts to form a ball and all the ingredients are incorporated, stop mixing. Cover the bowl with a clean kitchen towel and let rest overnight or for at least 10 hours.
- The next morning place the dough on a floured surface. Form into a round dough ball using a pastry scraper and a few sprinkles of flour. Sprinkle the top of the dough ball with a little flour and cover with a clean kitchen towel. Allow the dough to rest for 30 minutes while you heat an empty Dutch Oven in a 400 degree oven.
- Place the EMPTY Dutch Oven, with the lid on, into a 400 degree oven for 30 minutes while the dough is resting. This step is vital to making this bread!
- Remove the hot Dutch Oven and place the dough in the center using a pastry scraper. Be careful! The Dutch Oven is 400 degrees. Use a hot pad to put the lid back on and place back in the 400 degree oven for 30 minutes (with the lid on).
- After 30 minutes of baking (with the lid on) remove the lid, and bake for an additional 10 minutes. This will create the golden brown crispy crust.
- After 10 minutes of baking without the lid, the bread is golden brown and ready to come out of the oven but don't stop there. Remove the hot bread from the Dutch Oven using the back of a wooden spoon to lift and grab (with hot pads) and place it on a cooling rack. Do not leave it in the hot Dutch Oven!
- Now for the final and hardest step of all. Allow the bread to cool before slicing!
Notes
Remember to be creative with your food. It doesn’t have to be complicated and there is inspiration all around you. Try making this Easy Honey Oat Bread today. It only takes a few ingredients, a little bit of time, and is so worth it!
About the Author

I love animals, gardening, pickleball, and being creative in my kitchen. I can’t waste food and rarely follow the recipe! As an IIN Certified Integrative Nutrition Health Coach I can help you get from where you are to where you want to be. Join me on my journey!


Leave a Reply